DIY Friday | Post #5
Hello, readers! ♥
Let’s talk about nightstands. (This might seem boring, but I promise it gets better.)
Some people don’t see the need for them, at all. Night stands are often considered a luxury piece of furniture for the young and budget conscious, and unnecessary if you’re low on square footage in your humble abode (likely a loft or apartment).
I’m in the other camp. I think they’re handy for just about everything. You can put a cute lamp on top with a fresh cup of water for the night and keep that charging cell phone within arms reach. The shelves can be used to house books, reading glasses, and much more.
Here’s the thing, though: most department store nightstands are in the ballpark of one hundred dollars. Let me say that again… one hundred dollars. I get it, they’re super cute, and mostly of good quality. But no matter what, that was definitely not in my budget when I was single and paying an outrageous monthly rent.
So today I’m going to show you how you can turn an inexpensive pre-fabricated nightstand into something with much more pizzazz – for $10 or less. If you don’t currently own a nightstand, you can pick one up similar to what I had for around $10 or $12. That still saves you a bunch, and you can tell people it’s something you made yourself.
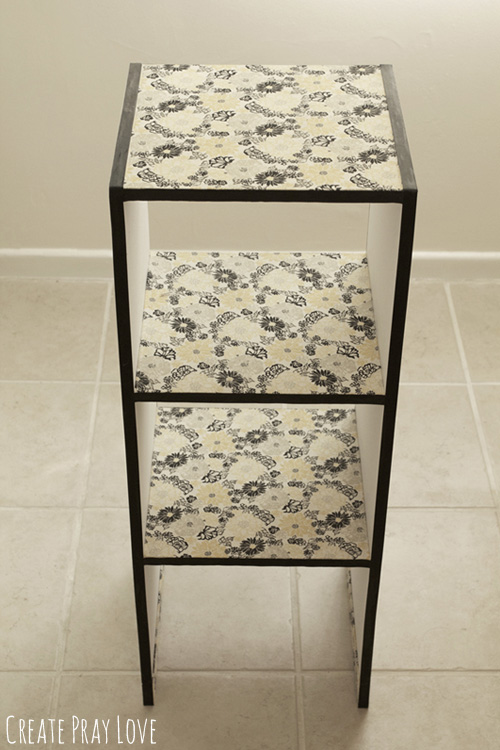
This is a picture of the end result of my efforts:
Aaaand this is what I started with, the cheap shelving unit I bought in college to use as my nightstand:
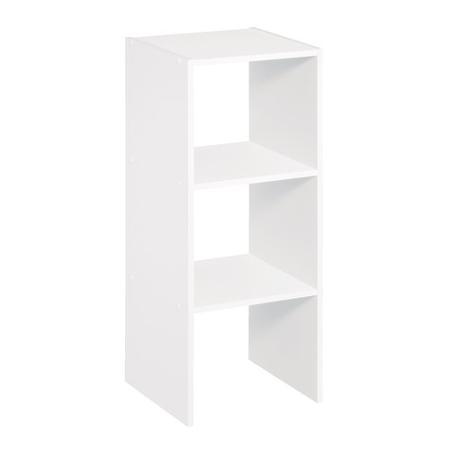
It did the job, and I loved all of the shelving and storage space. However, once I was out of college and living on my own, I wanted to transform it into something a little more attractive that would accent the other furniture in my apartment. So I dug out the Mod Podge, bought some cute patterned material, and voila! I suddenly had a charming & affordable nightstand which wasn’t too complicated to put together. The good news is that you can create one as well!
So let’s get to it.
Here’s what you’ll need:
- 1 yard of white fabric
- 1 yard of patterned fabric
- 1 roll of black ribbon- 3/4 inch thick
- Matte Finish Mod Podge
- Scissors
- Paint Brush- any kind will do!
Before you start, you should decide which material you’ll want where. I decided to put the patterned material on the top side of every shelf and white material everywhere else. I also ran a strip of the patterned material on the very bottom.
You’ll also need to decide what sort of texture you will want for the different types of material. By this, I mean that I used Mod Podge to “glue” all of the material to the laminate nightstand, but I decided to paint an extra layer on top of the white material to give it a matte finish and a protective layer. But I left the patterned material without a layer of Mod Podge on top because I liked how it looked without it.
Once you’ve made these two decisions, you’re ready to get started!
Here are the rest of the steps:
- Cut all of your material so that the strips are just slightly bigger than the sections they’ll be covering on the nightstand. You won’t want any fringe showing, so the extra material on each side will get folded over onto the edge. The black ribbon will cover this up later.
- Start with the white material first. One section at a time, top to bottom, use your paintbrush to spread a layer of Mod Podge onto the laminate and then start laying down the white material on top. You can use a ruler or any sort of straight edge to get out the air bubbles and wrinkles as you go.
- Continue doing this for the rest of the white material sections. Fold the edges over and use Mod Podge to make them stick onto the edges of the nightstand.
- If you choose to do so, spread a layer of Mod Podge on top of the white material as well for a nice, matte finished look. Let this dry.
- Next comes the patterned material. For the top shelf, you can paste all of the fringes onto the edge (wherever the black ribbon is in the above picture). But for the lower two shelves, you’ll fold the side fringes of the material underneath itself while the front/back fringes will be folded over onto the edge. This will give it a nice, tight look. Do this one section at a time as well.
- If you want to do a bottom strip of patterned material, decide how tall you’ll want it to be and cut it accordingly. The very top of the fringe will be folded underneath, and the bottom and sides will be pasted onto the edges.
- If you choose to do a top layer of Mod Podge on the patterned material, do it now and let it dry before the next step.
- The last thing that you’ll do is put on the black ribbon on every edge of the nightstand. You’ll put a layer of Mod Podge on to glue it to the surface, and I did an extra layer on top for a matte finish since my ribbon was originally more glossy.
Let everything dry for a day or two before you put anything on the nightstand, depending on how many top layers of Mod Podge you did.
Enjoy!

Connect with me on social media!
facebook - twitter - pinterest - instagram
3 Simple Ways to Decorate Easter Eggs + a Spring Printable
March 28, 2017 at 11:04 pm[…] discovered how much I love Mod Podge a few years ago when I used it to give my old nightstand a makeover with fabric. Ever since then, it’s been one of my go-to ways to spruce up any project, from […]