**I was compensated for this post. This post on how to make a Dollar Tree Christmas Garland also contains affiliate links and I will be compensated if you make a purchase after clicking on my links.
Hi friends! Happy Monday! I’m here to bring you a little bit of an early Christmas home decor DIY project. I know… it’s still fall. But when the Dollar Tree announced an opportunity to work with them on a Christmas craft, I couldn’t resist!
And you all know how much I love shopping at dollar stores, so here we are.
I spent some time browsing my local Dollar Tree last week to pick out supplies for this project. But did you know that they also have some things available for purchase online?! I’ve provided my affiliate links for those products in the supplies list below!
I spent about $7 total on this project & I love how it turned out!
Something else exciting is that I have also published my first YouTube video ever to go along with this tutorial! I am going to be embedding it at the end of this post. I’m still going to include some instructions here though, because I know it can be helpful to have written instructions for a DIY or craft project.
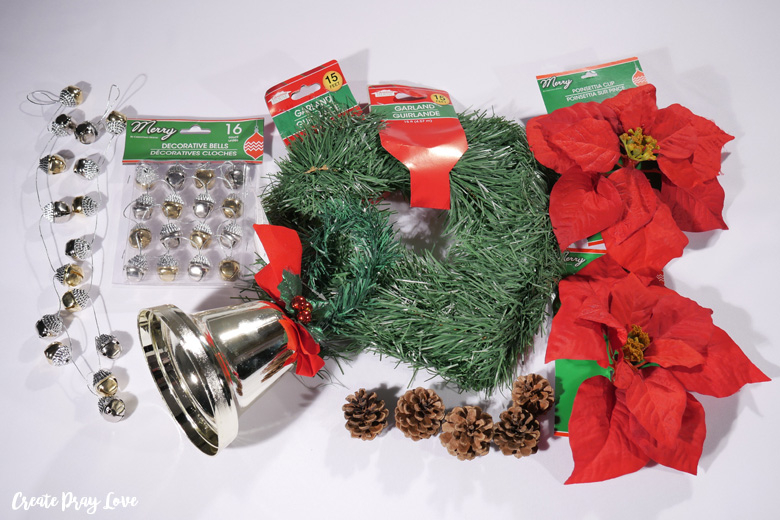
SUPPLIES USED:
- 15 ft. long garlands* (x 2)
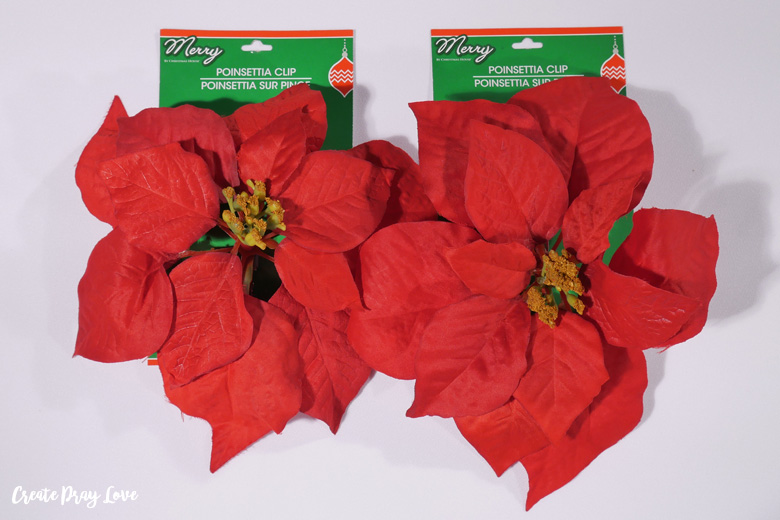
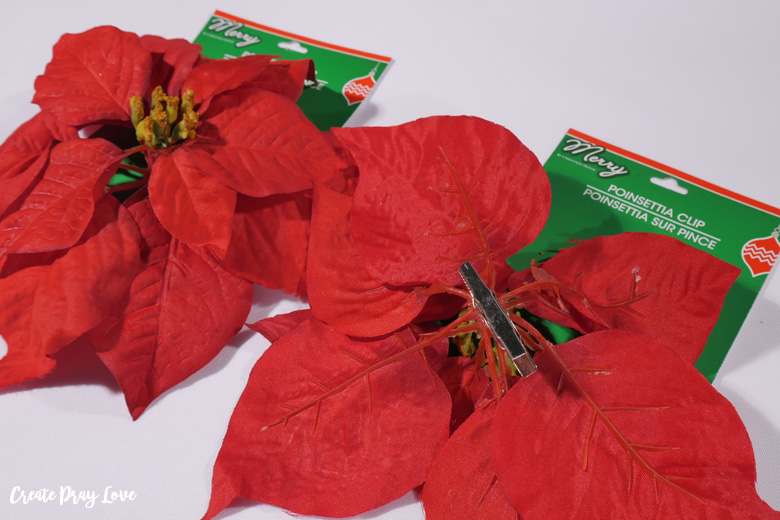
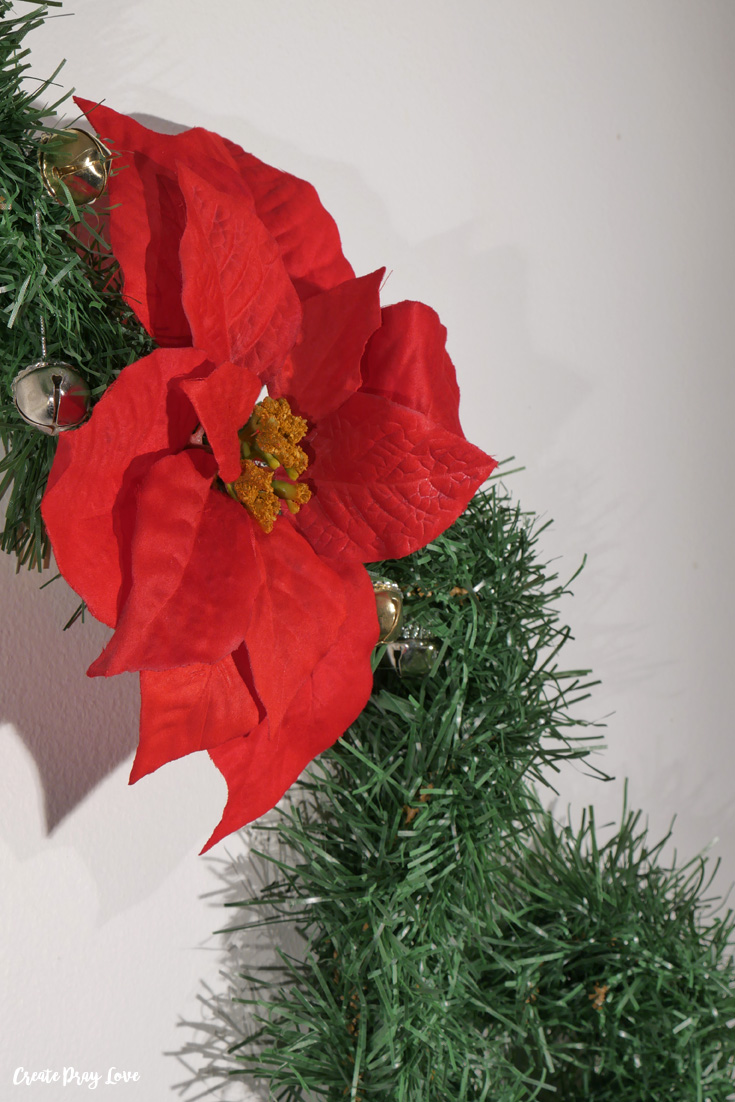
- Poinsettia flower clips* (x 2)
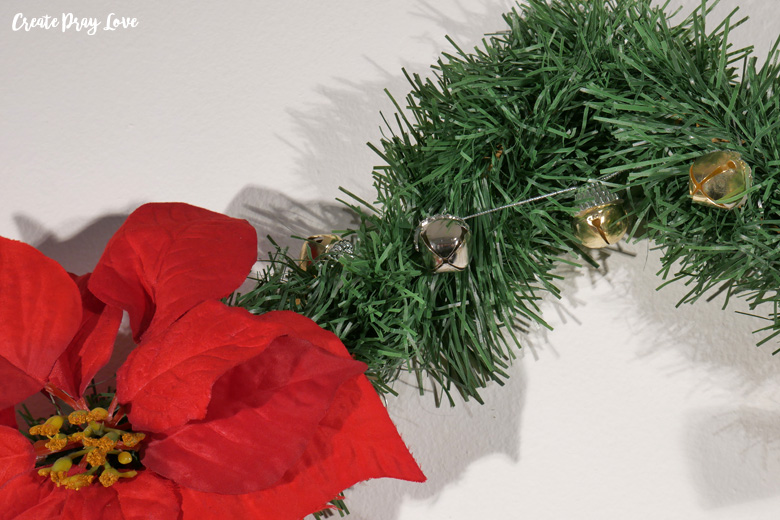
- Strands of small bells (x 2)
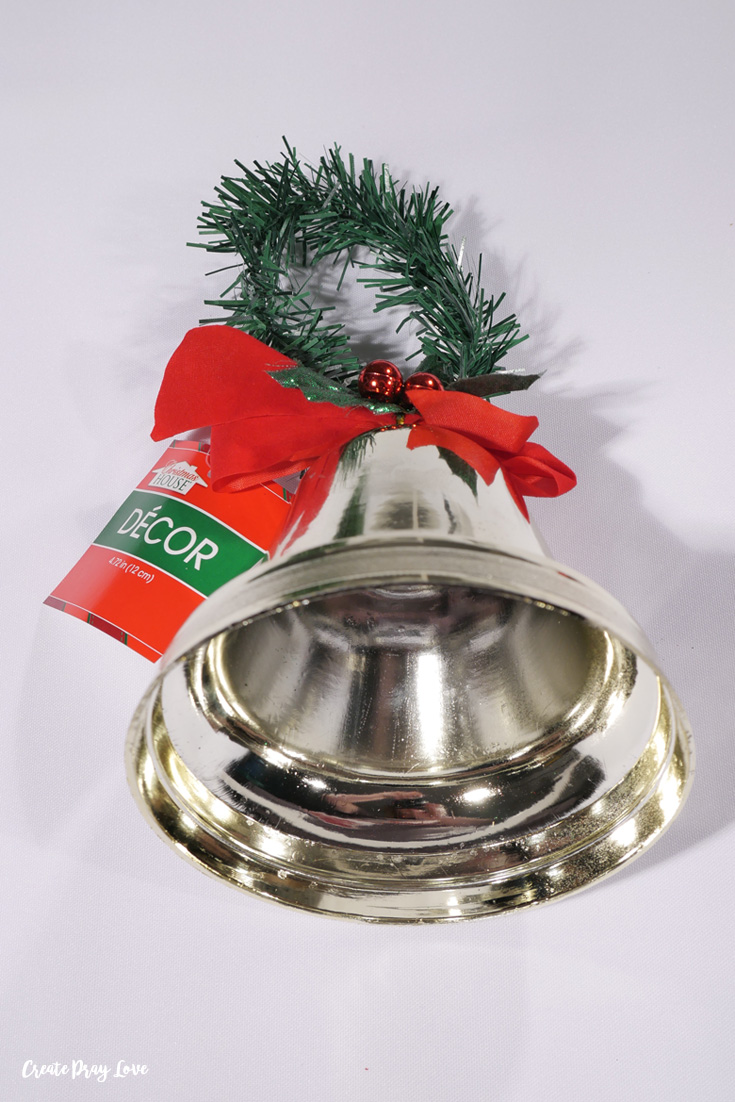
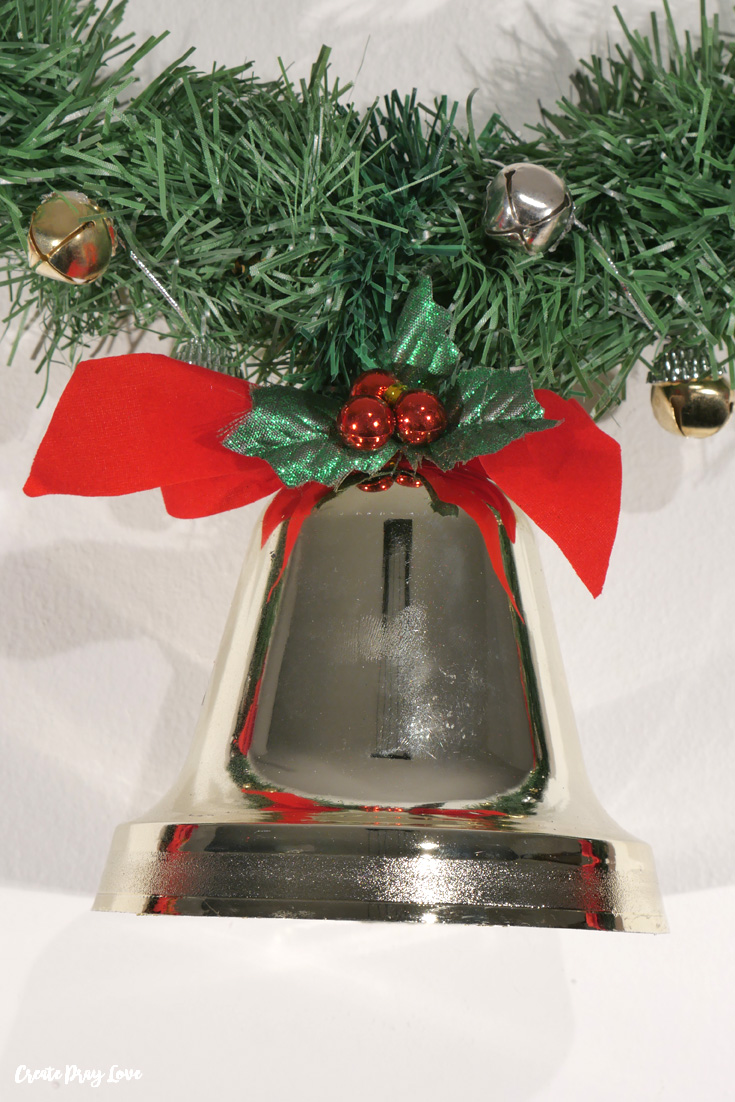
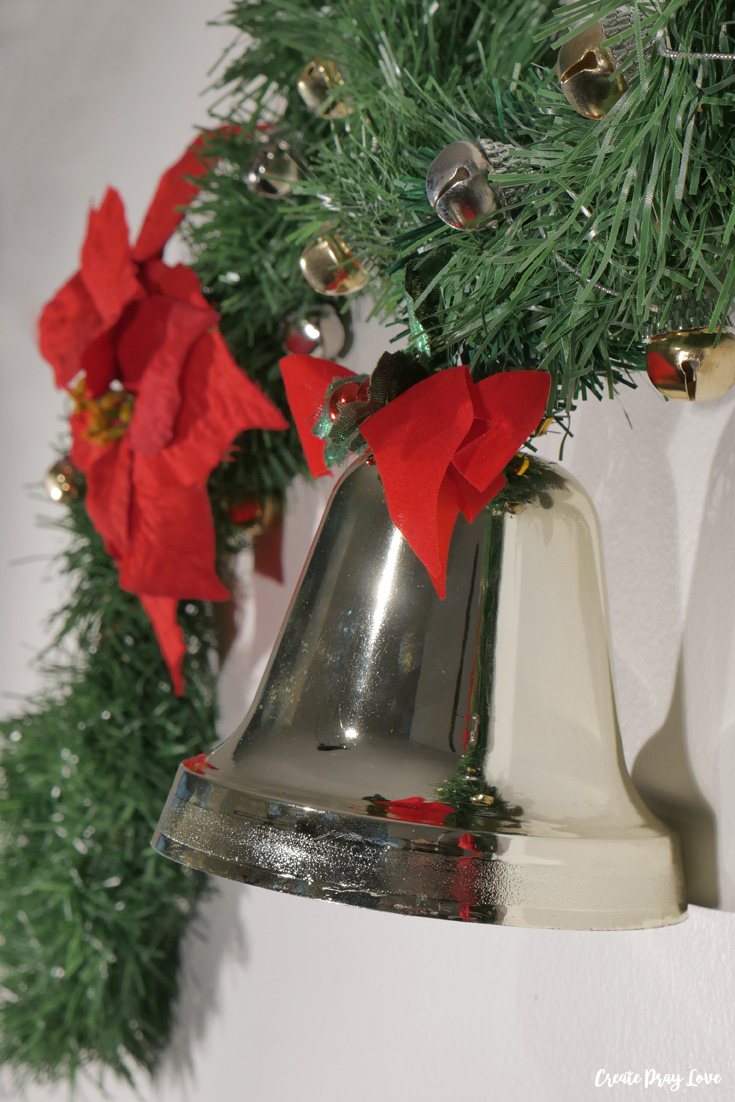
- 1 large bell
- Scissors
- Hammer + nails (for hanging the garland)

HOW TO MAKE A DIY DOLLAR TREE CHRISTMAS GARLAND:
- Remove all the tags and packaging from your items.
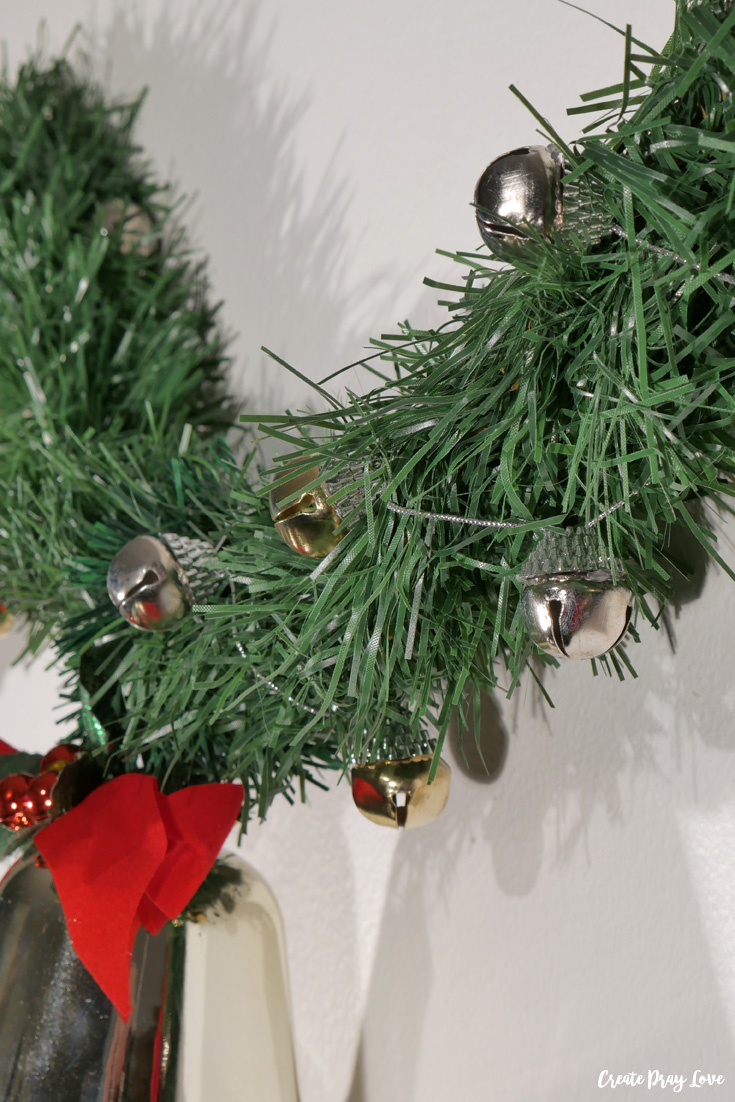
- Unravel both garlands and cut them in half. This will give you four strands of garland that are about 7.5 feet long each.
- Twist the four pieces of garland together to make one thicker strand of garland.
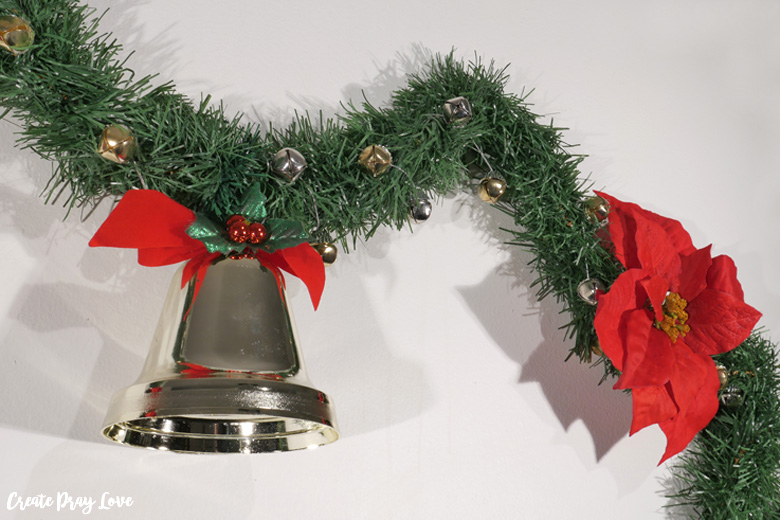
- Slide the bell onto the garland until it gets to the middle.
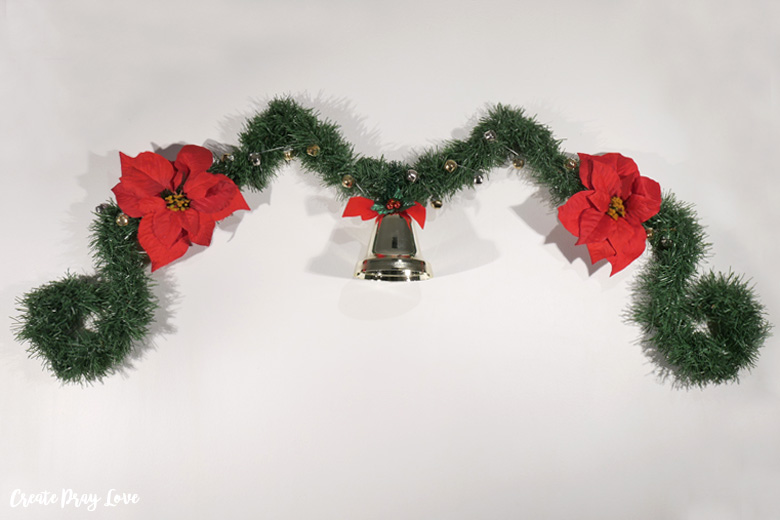
- Figure out the shape you want the garland to be. I hung this in my kitchen where there were already four screws in the wall, which meant I was going to have a garland with four points & three loops, one loop between each screw.
- Wrap the strands of bells around the garland. I only used two strands & chose not to have them go all the way to each tip. If you want them to go all the way across, you may need to buy another strand or two.
- Clip the poinsettia flowers onto the garland. I chose to clip them in the middle of each side loop.
- Hang the garland on the wall & adjust if needed.
This is how my final product turned out!

PIN THIS DOLLAR TREE CHRISTMAS GARLAND TUTORIAL FOR LATER:

Other dollar store projects you may enjoy:
Dollar Store Painted Pumpkins & Fall Living Room Tour
Dollar Store Thanksgiving Tablescape
Check out some other projects that my crafty friends have done with Dollar Tree products!
Want even more inspiration?
Check out these websites, which are an amazing resource for crafts and DIY project ideas!

Connect with me on social media!
facebook - twitter - pinterest - instagram
DIY Rae Dunn Inspired Mini Christmas Sign - Create Pray Love
December 1, 2017 at 8:23 am[…] DIY Dollar Tree Christmas Garland […]
A Merry and Bright Christmas Home Tour - Create Pray Love
December 5, 2017 at 4:31 am[…] DIY Dollar Tree Christmas Garland […]