Affiliate links have been used in this post about how to make rustic wedding table numbers. This means I can earn fees by linking to products on websites I am associated with via affiliate advertising programs. Please note that all affiliate links have been marked with an asterisk* such as this. If you have any further questions about this, you can click here to read my policies page.
Hi everyone! Today, I’m so excited to share this easy DIY woodburning project tutorial with you. I used it to make rustic wedding table numbers, but keep in mind that you can also use this technique to make decor for your home!

And just in case you’ve never tried woodburning before, here are a few tips to get you started!
- Avoid working with wood that is extra grainy because it may make your lines more bumpy & uneven.
- Be sure to use the correct woodburning tip for your tool & for your project. The one I used for this one was the rounded Flow Point tip, which is best for creating curved lines.
- If you want to stain your wood, it’s best to do so after the numbers have been burned into it.
- Some woodburning tools* give you the option to select different burning temperatures, but a standard single-temp tool will do just fine for most projects.
- And finally, for safety, make sure that you have some ventilation because you end up creating a little bit of smoke when you burn the wood surface. One final note- this project also might not be the best one for small children as the tools can get quite hot.

Materials You’ll Need for This Woodburning Project:
- Woodburning kit with tool & tips* (I used a Flow Point tip for this project)
- Fine sandpaper*
- Graphite paper*
- Printer* & printer paper
- Pencil or pen
- Scissors
- Wood rounds* or Wooden plaque
- Scotch tape
- Wood stain (optional)
- Paint brush (optional)

How to Make Rustic Wedding Table Numbers With This Woodburning Technique
Step 1: Print out the numbers you need & tape them to your piece of wood along with your graphite paper.
For this tutorial, I did woodburning on two different wood pieces, & decided to pick different fonts for the numbers on each of them. The font for number 12 on the rectangle plaque is a little bit thicker, which worked well, & the font for number 5 on the wood slice is a little thinner & more artistic, which I loved.
One thing you will want to pay attention to though is whether or not the fonts you pick are easy to read. Don’t make your guests have to guess whether they are looking at a number 1 or a number 7!

When you tape your graphite paper onto the wood, make sure the darker side is facing down. And the paper with your numbers will go on top of that!

Here is what the round wood slice looks like with everything taped to it.

It can be a little tricky to ensure the number is centered, but you’ve totally got this!

Step 2: Trace the letters & numbers with a pencil or pen.
This part of the tutorial is basically magic! 😉
When you trace the numbers with your pencil, the graphite paper leaves an impression on the wood & creates a perfect outline for you to work with in the next step.

Side note, if you mess up, you can totally erase the charcoal lines with a standard pencil eraser!

Step 3: Outline the letters & numbers with a round woodburning tip.
Before you start shading in your numbers, you will want to outline everything first with a round woodburning tip (aka the Flow Point tip).
Using other tips for the curved lines will probably not give you the best results!

Also, don’t worry if your outline doesn’t look perfect at this point, because you can always fix it later when you are shading in the numbers.

Step 4: Remove excess charred leftovers from the tip with sandpaper.
You may notice that the woodburning tip may collect a bit of charred debris the more you use it.
Feel free to wipe this off onto a piece of fine sandpaper every so often so that it gets clean & can better burn the wood you are working with.

Step 5: Fill in the numbers & letters with either your round tip or a universal point.
If you opted to have thicker numbers for any of your wood pieces, then you may have to do a bit of extra shading in order to fill them in. You can do this with any number of tips, all depending on what you want for the end result.
I prefer using my round tip for the shading as well as the outlining simply because it provides me with the most freedom of movement. However, other tips (such as the Universal Point & the Shading Point) can also be used.

This is how it should look when it’s all been filled in!


I chose to leave my wood unstained, but as an optional finishing touch, you can definitely give your table numbers a light stain! You can apply it with either a paint brush or a towel.

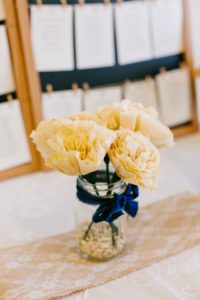
These rustic table numbers would complement any arrangement of greenery or wildflowers as part of a wedding table centerpiece.
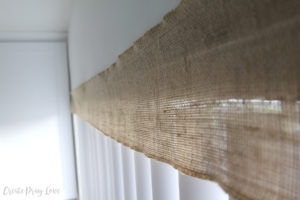
You could also add some burlap or lace to the bottom for even more of a stunning effect.


Which style do you prefer? A wood slice or a wooden plaque? I’d love to hear from you in the comments!
MORE POSTS LIKE THIS ONE YOU MAY ENJOY:
Coffee Filter Flowers Tutorial
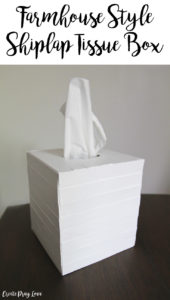
DIY Farmhouse Style Shiplap Tissue Box
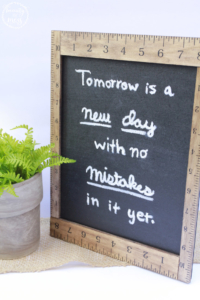
How to Make a DIY Farmhouse Chalkboard Frame

Connect with me on social media!
facebook - twitter - pinterest - instagram
Sophie
July 27, 2017 at 1:53 pmThey look great! I bought a woodburning tool a few years ago but never quite got the hang of it, but I think I’ll have another try! I love the wood slice best, but they’re both lovely 🙂
Create Pray Love
July 30, 2017 at 9:29 pmThe same thing happened to me! I’ve had this for years but never did anything with it until recently. Now I love it! 🙂
Jessica
July 27, 2017 at 5:41 pmI like the look of the plaque best, though they are both beautiful. I think I’m going to have to add wood burning to my list of things I want to try!
Create Pray Love
July 30, 2017 at 9:30 pmYes, you should! Thank you for the love, Jessica! 🙂
Habiba
July 30, 2017 at 9:47 amI’ve wood burned before and I really like it. But I always struggled with the residue on my dremel. Thank you so much for the cleaning tip with the sandpaper!!! Will give it a try very soon.
Easy Repurposed DIY Wall Succulent Planter - Create Pray Love
August 12, 2017 at 10:57 pm[…] If you’ve never used a woodburning kit before, I actually have a full tutorial on how to do that here. […]
Nyge
February 20, 2018 at 1:27 pmTry wetting the wood first